Using Google Cloud Storage for Screenshots
For a while, I used vgy.me for hosting my screenshots, and while I didn't have any issues with it until recently. It never really occurred to me that I should host my own. A few days ago I started having 404 and 500 errors with vgy.me so I said that's enough and I began research on the top cloud providers (Google, AWS, and Azure). I settled on Google Cloud Platform hence this post.
You don't have to use this just for screenshots, but any type of files. After all, it is a storage platform, but we're just using it for screenshots in this post.
Setting up Your Storage Bucket
With GCP you pay for what you use. 1GB storage is $0.026 per GB-month etc. Read more on the pricing here.
So now we begin.
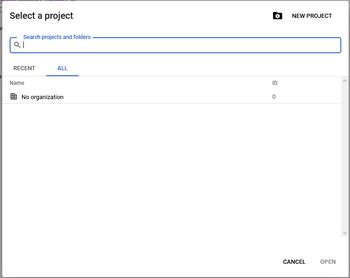
- Head over to the Google Console.
- Choose "Select a project"

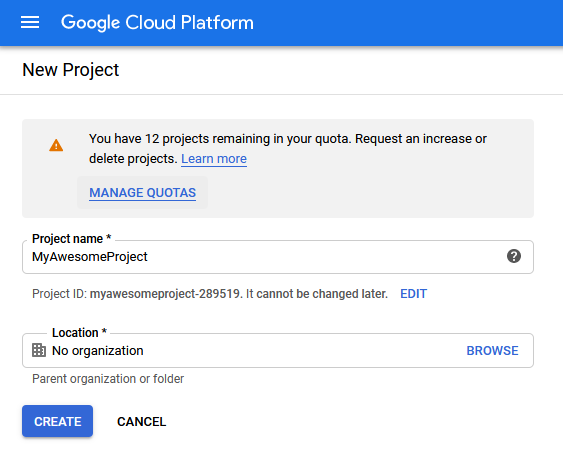
- Choose "New Project"
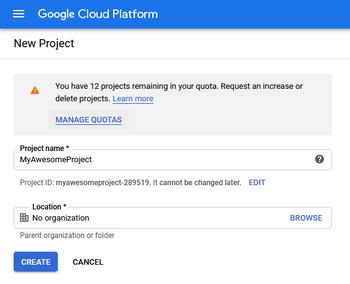
- Name your project if you want to and press create. (if you have an organization then feel free to choose it also.

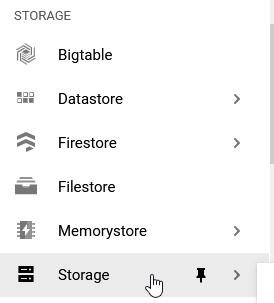
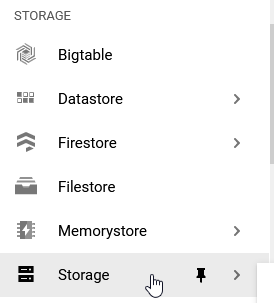
- Scroll down on the left of the screen and look for "Storage"
- Before being able to create a bucket you may need to add a billing method. I'm not going to do that in this guide as I've already done it and it literally tells you to add one if you need to so just go do that.

- Once you have your billing setup then you can press "Create Bucket".

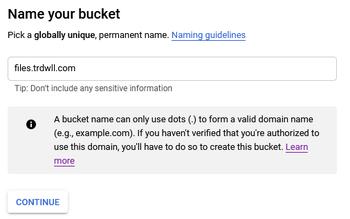
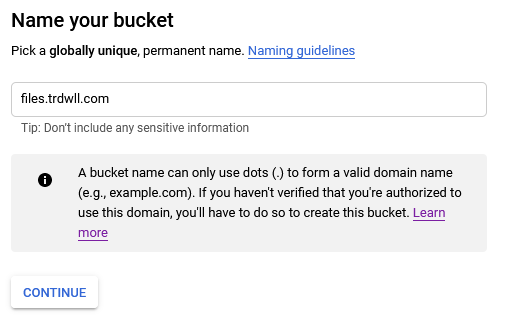
- Name your new bucket. (this can be anything, but if you want to use your own domain then put that domain here)
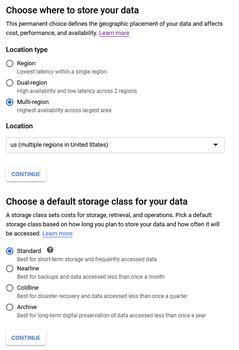
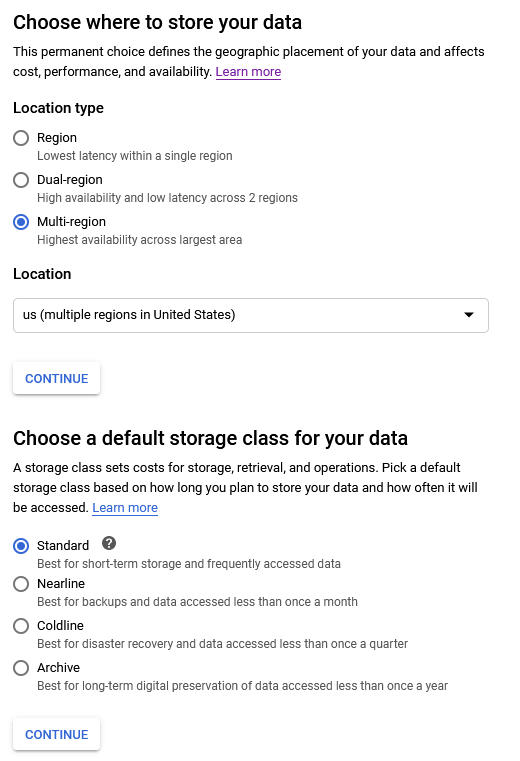
- Set your location and storage class.
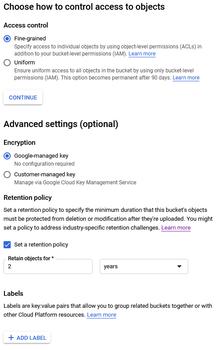
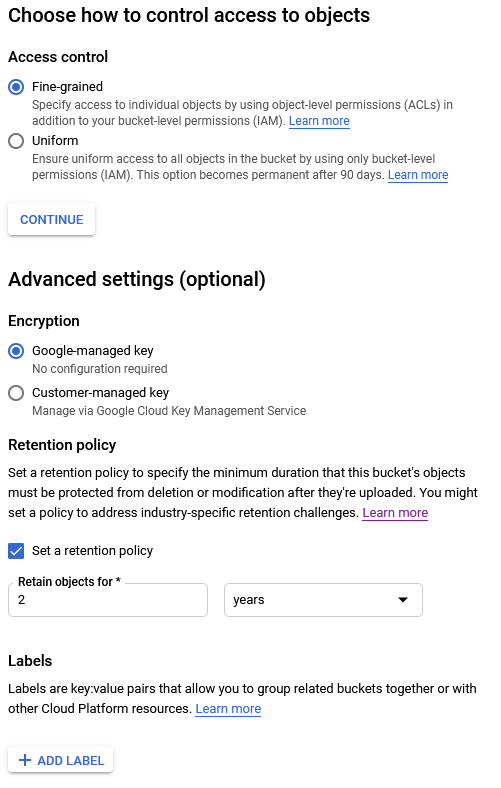
- Set other settings.
- Excellent! Now press the big Create button at the bottom.


Setting up ShareX to Upload to GCP
- Open ShareX and set your destinations to Google Cloud Storage.
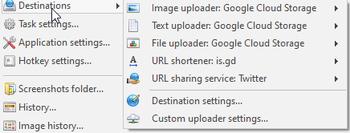
- Then go to Destination settings and scroll to find Google Cloud Storage.
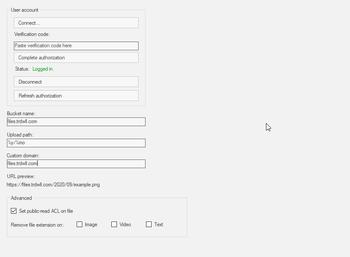
- Press Connect and sign in with the email that you created the bucket under. It'll give you a token which then you'll paste it into ShareX under "verify code" then press Complete authorization.
- Set your bucket name to the bucket name from the bucket above. Set your custom domain if you have that setup also. (you'll have to add a CNAME record (for this guide it's files and then c.storage.googleapis.com as the value))
- Done!

until next time